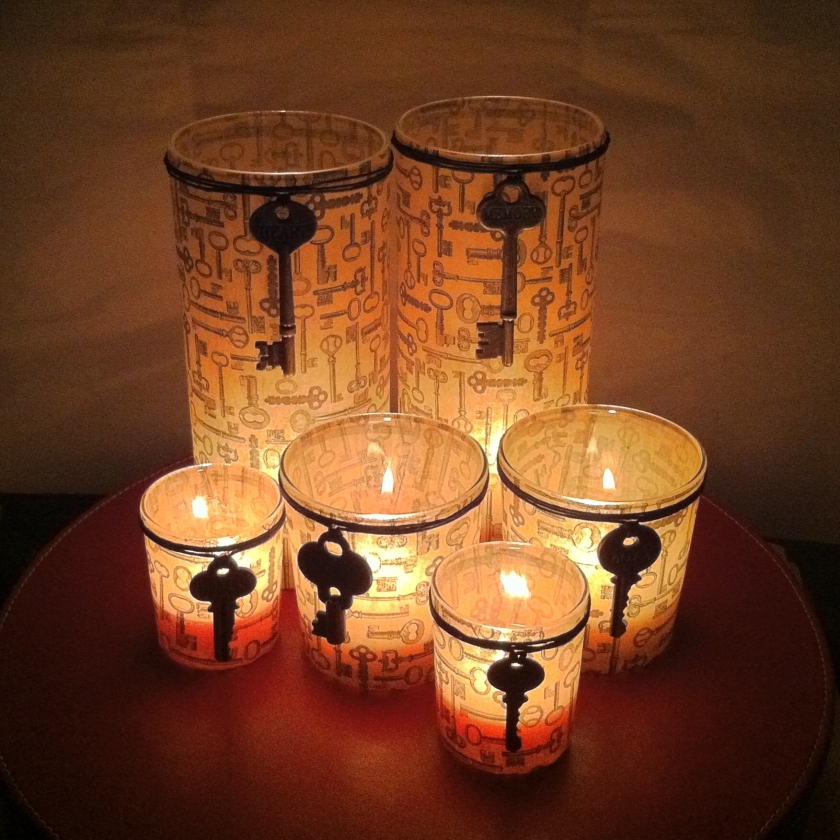
This project started as an idea while shopping at the craft store. I came across two different materials that I wanted to put together. One item is a great set of decorative keys from artist Tim Holtz. The other item was a package of five sheets of tissue paper. This tissue paper is 12 x 12 inches and I found it in the scrapbook section with all of the single sheet papers. As soon as I saw the paper I knew I wanted to make candle holders. I had made one tissue papered candle holder in the past and love how they light up with a nice glow. This particular paper has a nice warm color to it, almost like antique paper. The best part, it’s covered in keys! An all over print in black of many styles of keys lends itself perfectly to being paired with the decorative keys.

To complete my materials list I needed to get some clear glass candle holders. I had seven keys to play with so I wanted to make six holders that could be split up into two sets of three. I went to the Dollar Tree for my largest glass cylinders, these sell at other stores for much more, always check the Dollar Tree! Finding small votive size glass cylinders was also easy and inexpensive. The medium size proved to be a little tricky. I looked lots of places but the glass was either curved or has a decorative bottom or top edge, I couldn’t find a plain cylinder. Finally, I found some drinking glasses that look just like my large and small cylinders. Now for the fun part, papering the glass pieces. I used Mod Podge in matte finish with a foam brush. I painted a few inch wide strip on one side of the glass, top to bottom. I lined up the edge of the paper with the top of the glass and pressed it down. Smooth out the bubble as you go, gluing in smaller sections makes this easy to do. I had wrapped my paper around before gluing to cut it down to size. Leave a small overlap and glue the edge down.

Now you have a clean top edge but too much paper left on the bottom. Cut strips down to the bottom of the glass. Trim the strips so that they reach about the middle of the bottom when folded over. Give the base a coat of Mod Podge and then one at a time, fold over your strips of paper. You will end up with a nice spiral covering.

Once you have papered each holder, give it two coats of Mod Podge, letting it dry between each coat. This will keep the surface in good shape, tissue paper is delicate stuff! When your pieces are dry, I suggest adding a finishing paper to the base. I always like how it looks. I used brown velvet paper and double-sided adhesive sheets that I cut to fit each glass piece.

With the papering done, it’s time to add the metal keys. I chose to use black paper chord, also from the craft store. I wound it around the top three times, added a few inches and cut, do this for all of the glass pieces. I folded the chord in half and tucked it into the hole on the key, creating a loop that would allow the key to hang flat. I used a small dab of hot glue to initially hold the key in place, just behind the paper chord. Wrap the chord around and tie in the back. I used a thin line of Elmer’s white glue around the top of the chord, just to keep it from sliding down. It dries clear, you just need a little bit. The keys will make a clanking sound on the glass, I just put a tiny piece of Glue Dots Line behind each key to hold it flat.


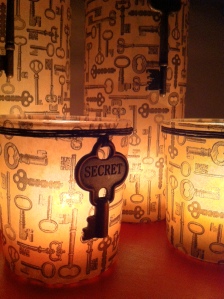
The finished pieces look so great. I took some outdoor pictures as well as some pictures of them lit up. I love how these came out, and I made them all for about $20.00!


The possibilities are endless with this project. Tissue paper comes in all sorts of colors and patters. With inexpensive glass cylinders, you can make these for every occasion. You can leave off the embellishments and save more money. Try making a bunch next time you need centerpieces for a special event! If you want to make them as wedding favors, use battery operated tea lights. At the end of the night, your guests can take one home! And, without touching warm glass and spilling hot wax everywhere, they will be more than happy to take them. Enjoy!

![]()

Love, love, love these! I have so many decorative keys that I could use in making these candle holders. I’m gonna have to do this!! Thanks for sharing this with us.
I adore these they are gorgeous but one quick question do the keys get dangerously hot when the candles been burning a while?
Thanks for the compliment! I haven’t noticed them getting hot, but I don’t really burn things for more than a couple hours typically. If you do notice heat becoming an issue, you could always use the battery operated tealight candles. Hope that helps!
could probably use scrap booking paper also.
Wow!! tHESE ARE FABULOUS!! You just opened a door with these keys!!TFS
I like this idea as I have a bunch of keys I found when settling my mothers estate in 2010. Thank You for sharing.
I love this idea, im going to give it a try for sure, im in Australia, when you say tissue paper is that like out tissue paper lol? Also the glue you used with i be able to find it in Australia please, thank you for your help
The glue I used, Mod Podge, can be found online at http://www.plaidonline.com/mod-podge/brand/home.htm they have a list of stores in Australia that carry products made by the manufacturer of Mod Podge, which might include the glue itself. Take a look! If not, and you don’t want to order it online, you could use regular white glue to adhere the tissue paper and then give it a coat of sealer, I like spray on sealers and clear coats. The tissue paper we have is used a lot for gift wrapping if that helps. The stuff I got was the same material just pre-cut to 12×12″ size. I’m sure our tissue paper is the same 🙂 Good luck with your project and if you want to post a picture of your finished work feel free to do so on my Created by Jess Facebook page! Thanks!
These turned out just great!! I love old keys, and this is a wonderful way to show them off! Thanks for the inspiration!
Thanks for reading! I’ve always liked old or antique looking keys too, finding the paper gave me an excuse to buy the keys! 🙂
Very nice! Love the look!
Thanks so much!
The candles are beautiful. I am not much of a diy crafter. But, I think I could really do this one. Never knew tissue paper comes in so many designs.
Thanks! I’m glad you feel like it’s something worth trying, it really is easy!
Thanks for mentioning me over at Craftgossip.com!